I realized that most of my posts this year have been about kids' clothes or bags that I have made. I guess that is what I have been sewing as well. But I got my start in the sewing world as a quilter. So I am going to share some of the MANY baby quilts I have made over the years. Baby quilts are such a wonderful way to get started quilting. They are easy to FINISH, and I don't get as bored with the design by the time I am done.
This "bubbles" quilt I made for a dear friend of mine. This was for her 2nd daughter. I saw this idea online and just figured it out on my own.
This quilt I made for a friend's 1st child. It was really fun to make a quirky, colorful quilt that fits her style. We were able to take the quilt and meet her precious little boy! I think he likes the quilt as well. The pattern was in Quilt Sampler Magazine.
This last quilt was made for my niece. We had this precious Beatrix Potter fabric the depicted Peter Rabbit and all the other characters in such sweet pastels that I couldn't resist. I believe that I put minke on the back of this quilt, which made it extra special to cuddle with!
Saturday, November 20, 2010
Monday, November 15, 2010
The Cutest Bag!
I tried a new bag pattern over the weekend. I was with my Mom at a great quilt retreat at the shop I used to work for, Susan's Calico Creations. The pattern is called Six in the City by Artful Offerings. It is just a really cutesy, type bag and I had a lot of fun making it!
Wednesday, October 27, 2010
Left Overs
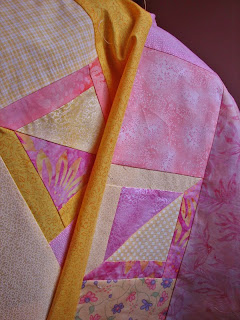
My Mom, a wonderful quilter, usually has scraps for me to take home when I visit. At my church we make quilts to donate and it is a good way to use up scraps!
So.. she gave me some AWESOME scraps of pinks and yellows from some baby quilts she made and here are the results. A quilt and a bag. (Yes.. those were SOME scraps!!) The kids' bag is going to be given to a raffle for a school event and the quilt will go to some great kiddo at Grace Place this Christmas.
Monday, August 23, 2010
Anniversary Wall Hanging
I was hired this summer to make a gift to celebrate a 50th Wedding anniversary. Kind of exciting!! My first project for hire!! They wanted the wedding photos of the parents and kids in the project as well as the photos of the grandkids.
I also worked in a "stained glass-like" cross.
This project was really fun. Again editing images and printing them off onto fabric and THEN, like a puzzle, getting it all to fit. I was not working with a pattern on this project, so it all came together as I went. I am happy with the result and the client was as well. I heard the Anniversary couple liked it as well, which is the most important part!
Taste of Summer
There is nothing that fully expresses the flavor of summer than home-grown tomatoes! As you all know, their flavor explodes in your mouth! My mother-in-law brought me some gorgeous tomatoes that we savored! BLTs, homemade sauce and caprese salad graced our table.
So in tribute to summer and great tomatoes, here is caprese salad!
So simple, yet so yummy!
1 or 2 tomatoes
1 package buffalo Mozzarella (it looks like a ball)
basil (sliced to to thin strips)
Balsamic vinegar
olive oil
You just slice the tomatoes and mozzarella and alternate them on your plate or platter. Sprinkle on the basil and then drizzle the balsamic vinegar and olive oil over it all. Salt and pepper to taste!
We love to have this with something grilled. YUM!
Sunday, August 22, 2010
Seven Skirts
I have been blessed with six nieces on my husband's side of the family. If you include my own Miss E, that make 7 granddaughters in total. Because I am a wonderful auntie... cough.. cough.. snicker... snicker I decided to make them all twirly skirts and embellished Ts. It won't be long until they day comes when it won't be so "cool" for the 2 eldest girls to wear something that matches the little ones that are 6 and 7 years younger. SO.... I got to the task of finding cute fabrics that would appeal to all the girls. I found many of them at a great shop in Stewartville, MN called All in Stitches. Needless to say I had a grand time buying fabric for this fun project!
I had a project-for-hire earlier in the summer and thus procrastinated my task a bit! Luckily a friend of mine came to visit that week and she helped me turn out the skirts and shirts!
So enjoy my "oh so cute" nieces and their matchy outfits! I sure did!
As noted before, I adapted a pattern by Pink Fig called The Patchwork Skirt and T-shirt for this project.
Tuesday, July 6, 2010
Fun summer dress!
I was trolling several blogs that I follow and one of my favorites the polkadot chair had a great pattern on her Tuesday Tutorial!
I picked up these really cute fabrics at the shop I used to work at, Susan's Calico Creations in Fulton, IL. Mom and I went there for a retreat a few weekends ago. These fabrics are so fun and Miss E just loves them.
She had fun helping decide the layout of the fabrics! The pattern is pretty easy. A little bit of gathering. No biggie after ALL those twirly skirts I have been making!
Wednesday, June 9, 2010
More fun bags....
I enjoy making bags as gifts. Mr. G finished up preschool this year and I made bags for his teacher and aid. He enjoyed his year and learned many great things.
For Mrs. M, I used denim, Dick & Jane, and alphabet fabric. It was a new pattern for me. The bag pattern is the Miranda Day Bag by Lazy Girl Designs. I really love this pattern and will make many more I'm sure!
The bag for the teacher's aid was such a different style, but REALLY fun to make!
The pattern is Birdie Sling by Amy Butler. Again, such a cute pattern, that I'm sure I will have fun making again.
Just a litte something
Thursday, May 20, 2010
Lynze's Quilt
I am a member of the Trinity Quilters at my church. We make quilts for graduating Seniors in high school to remind them of their church family when they go off into the next part of their life. I had the great joy to make a quilt for Lynze. She is the daughter of my good friend Anne.
Lynze likes to draw, so her Mom scanned many of her drawings and emailed them to me. I then printed them onto fabric to use in the quilt.
She also has favorite sayings, songs, poems and bible verses. I combined some with images and others just printed the text.
To finish the project, I hand quilted it with a "big stitch".
Lynze really loves the quilt, which makes me extremely happy!
Wednesday, May 12, 2010
My Student
My friend Sarah wanted to learn how to sew. I was very excited to teach her! We have daughters the same age and are having fun sewing for the girls and other projects.
Her blog is so cute! Here is the link so you can see what my star pupil has been sewing.
Simply Said
Her blog is so cute! Here is the link so you can see what my star pupil has been sewing.
Simply Said
Monday, April 26, 2010
Twirly Skirt Part 2
As I was preparing to head to Iowa for a fun weekend with friends, I was reminded that sweet little "D's" birthday was the Monday after our visit. Well... what this curly Sue needed for her 4th bday was a twirly skirt. Miss D is a very girly girl! Loves shoes and all things twirly and princess-like!! Thank goodness I had plenty of extra fabric on hand for a skirt that would be similar to Miss E's. That way they could be cute matchy twirly girls together on ISU campus for VEISHEA!!
Her skirt was a little simplified. I used long strips instead of the patchwork squares! A piece of cake!!
Miss D enjoys her skirt! She was playing in the dirt with her skirt all around her. I couldn't help taking a few shots!
Her skirt was a little simplified. I used long strips instead of the patchwork squares! A piece of cake!!
Miss D enjoys her skirt! She was playing in the dirt with her skirt all around her. I couldn't help taking a few shots!
Tuesday, April 20, 2010
SPRING has sprung
Spring is finally here!! Not that I can complain about the winter we had. We had it much better than my friends and family in Iowa. So...as I a think forward to summer I get hungry for fresh produce that I walk out into my back yard to harvest!
My wonderful hubby recognizes my need to "grow stuff" and let me dig some new beds in our yard, inside our fence and out of reach of the neighborhood deer.
Mr. G was very excited about helping me plant the "garden". He helped me choose seeds and is a master waterer. With his help, I planted lettuce (2 types), radishes, spinach, carrots, broccoli and cabbage.
After Sandy tromped through the garden making huge pawprints on top of the spinach, I put up a rope fence to keep her out.
Hopefully if my efforts prove to produce great results.. these beds will become "raised" beds next year.
Thursday, March 25, 2010
While the kids are away.. the Mommy will play!
A good friend of mine has wanted a sewing lesson for quite some time now. Two of her three kiddos are spending time with their Grandma this week, thus we found a chunk of time for that overdue sewing lesson! She has a daughter the same age as Miss E. They are great friends. So what does she need??? A TWIRLY SKIRT!!
This was a great first project for my friend. She got A LOT of practice sewing and making gathers. I know what you are thinking ... gathers.....her first time out.. that is a little ambitious! But she did a great job and we finished it in one day!
I can't wait to see her daughter twirling away in this adorable skirt! I'm sure this is just the beginning of her sewing adventures.
Next project: embellishing a t-shirt to match the twirly skirt.
Monday, March 22, 2010
Dinner at 6: Fish Tacos
Since I started this blog, I began reading more blogs. It is amazing what is out there in cyberspace! I wonder how many blogs there are on the web. The answer would probably astound me. Oh well, I am very inspired by the ones I currently read and that is great fun!
I haven't talked about cooking yet. I really enjoy cooking for my family and anyone else who shows up at our home. A great friend of mine, whose husband is a farmer, came to visit last weekend. It seemed like we talked about food a lot while they were here. We also had a wonderful dinner at a restaurant in White Bear Lake called Manitou Station. We all had dishes that we wouldn't normally prepare at home. It was wonderful! I tried scallops in brown butter and sage. VERY GOOD! Our friend had halibut (which happened to be "in season") with a carrot coulis. I didn't know what that was (coulis), but it is basically a puree. The word sounds like "coolee". So if you see that on a menu, don't be afraid. It is great!
So here at home, I have been cooking some of our favorites lately. One of those being fish tacos. Yes.. we are Midwesterners... but we love fish tacos!!
Rachel Ray's Fish Tacos
This is a recipe that used as a reference when I began making fish tacos. I do my own variation now, as I know how the kids like them. Fish tacos are pretty basic. Here is what you need:
Tortillas
Mild white fish (halibut, cod, tilapia, etc)
Coleslaw mix (or a whole cabbage if you like to make your own slaw. The purple variety makes for a very pretty slaw!!)
Avocado
Sour cream
Lemon or lemon juice
Shredded cheese (I typically use a med. cheddar, but you can mix it up with whatever your prefer)
Heat the tortillas in the skillet OR you can wrap several in foil and warm in the oven. Smear onto the warmed tortilla the "magic green sauce" as my kids call it, (blended avocado, sour cream, lemon juice and salt and pepper to taste).
Add the fish (prepared how you like: broiled, grilled, pan fried) You can season the fish to your liking. Simply with salt, pepper and lemon juice or kick it up a notch with other seasonings. Another note about fish: I struggle at times finding good fresh fish. Fresh fish should never smell... well... fishy!! I tend to have the best luck buying vacuum sealed frozen fish.
Add the cheese and slaw. DONE!! I also serve Spanish rice with this dish, because the hubby and I like it!
I'm sure Rachel's recipe is fancier than mine with more veggies, seasonings etc. When looking for recipes, you will find that some fish is breaded and fried. Also some are called "Baja fish tacos". This is a recipe that you can truly make your own way and should have a great result.
I tried taking some of my own photos when preparing my tacos, but my photography skills are a little lacking at this point. Ah well... I will learn as I go.
Sunday, March 21, 2010
Twirly Skirt
I bought a pattern last fall for a patchwork twirly skirt. It is really a cute pattern by Pink Fig. I collected some cute fabrics from JoAnn fabrics and the great quilt shop downtown here in Hudson called St. Croix County Dry Goods. They have really FUN fabrics.
After making Miss E's Easter dress I decided I was ready to tackle this skirt.
Actually, it is pretty simple. It just takes more time because you have to "finish" all the seams with a serger-like or zigzag stitch, which takes a bit longer.
In this photo, I have the top waist piece and the 1st row of patchwork.
This project does require gathers. My Mom and Mother-in-Law have helped me with gathering projects before and have given me great tips. The manual for my sewing machine also has information on gathering.
This skirt does not contain any type of "pattern" pieces. Is is written more like a quilt pattern, telling you the size of pieces to cut and not making you use a pattern or a template.
I must say as I read the pattern I was thinking.... "Golly this little skirt has ALOT of fabric in it!" The bottom striped piece is 3, 39" x 6" strips sewn together. But it makes for quite a twirly skirt and Miss E LOVES it. I'm sure I'll be making many more. She enjoyed choosing and laying out the blocks in an order that she liked.
Monday, March 15, 2010
Easter Dress
As I was shopping for Miss E's Easter dress, I was disappointed with the selection. I am not one to buy a foofy Easter dress that is impractical and rarely worn again. Of course the thought popped into my head..."hmmmm.. I guess I could make her dress." Which lead me straight to JoAnn fabrics to see if I could find a pattern that, A) I thought would look cute on her and B) that I could complete without pulling my hair out.
This is the pattern I found.
During this project, I relearned many things about following a pattern that I had forgotten.
1) Read the pattern CAREFULLY!! Closely examine how you should lay the fabrics and pattern pieces on the fabric BEFORE cutting. I didn't do this... but thankfully remembered before I got too far down the road. If you don't lay out fabrics correctly and pattern pieces right side down or right side up, you will be short of fabric OR your pieces will NOT FIT!!
2) Making clothing is an exercise in PATIENCE!! Read directions very carefully and be willing to laugh at yourself while tearing out seams! I kept trying to rush through it and at one point sewing the lining instead of the bodice etc. etc. I ended up with the zipper in backwards. HA HA!! At least I can laugh about it now.
3) When a pattern says to use a 5/8" seam, DO IT!! Or else your garment will not fit correctly. Sewing seams when making clothing is so much different than making quilts. With some practice I am getting the hang of it. I also use the serger stitch on my sewing machine quite a bit.
Making the Dress:
I sewed the bodice first. I have done this before, so it wasn't too bad.
As it was time to make the skirt of the dress,I learned a new term, stay.. This is what you sew tiers to... a stay. I was confused at first, but it made sense after I read the directions more carefully.
This dress has 3 tiers and really is a cute pattern. You can see the stay underneath the tiers.
And finally after battling with the zipper way more than necessary!! (God really thought I needed to work on my patience with this project.) The dress is finished.
Miss E really loves it and is excited to wear it for Easter and more.
Domestic Engineer
Since I am a stay at home Mom (Domestic Engineer) I get recruited by my children to complete a variety of projects. Well, Mr. G's project for me a week or so ago was a Chinook Helicopter made from K'nex. Of course it is the final and most difficult project in the book. I thought, "I am a Mommy, I can do this!!" And thus the task began.
Mr. G helped me quite a bit, finding parts and encouraging me to finish. He was having fun creating space ships of his own. By the time we were done.. there were not many pieces left in the box!
This project even has a motor in it so that the blades can move. Pretty cool!!
Mr. G's Star Wars lego dude, even decided to go for a ride. It was a fun project and I am glad to say that Mommies can build cool stuff too!
Tuesday, March 9, 2010
Something new
I'm not a seamstress. I am a quilter. I don't know much about making or repairing clothing, but I try my best. So, today I tackled putting a new zipper in my spring jacket. I really love this jacket, but it didn't have a separating zipper. So when I'd get in my car with it zipped up, it was putting too much stress on the zipper and of course.. it busted. SIGH!!! Of course.. I am a handy person. I can put in a new one! RIGHT??? RIGHT!!! However, you don't usually find zippers that perfectly match the one you are taking out. At least not at Jo Ann fabrics. But I have a dark grey/blue coat and black will have to do.
I did conquer this project today and am pleased with the results. Sorry, no photos. I just wanted to encourage people to try to fix something that is broken before throwing it out. Reduce.. reuse...recycle. Have a great day!
Sunday, March 7, 2010
What is old has become new.
Miss E had these adorable jeans with stitched appliques on them. Just so cute! However, they were falling apart. Holes in the knees and getting too short to boot. So I thought.. hmmm... they still fit her in the waist.. let's see if we can transform these into a skirt.
I did some searching on the web and came across a few sites. Site 1 and Site 2 have you adding a little panel of fabric in the center. Well, Miss E is itty bitty, so I just cut open the seams and used these sites for reference and did it my way.
These jeans have stretch in them, which helps. When I sewed them, I used a serger-like stitch to help with strength and to finish the edge I just turned it up and stitched it down with varigated thread and a cute little flower stitch that I seldom use on my machine. There was also a butterfly farther down on the leg of the jeans that I cut around and just stitched down with a small zig zag.
Miss E loves her new skirt! I'm glad that I was able to reuse some jeans that were beyond patching. So now her cousins will get a cute skirt handed down instead of holey jeans!!
Friday, March 5, 2010
Best Bag Around
Camille's Bag is a wonderful pattern that I really have enjoyed sewing as a gift. As you can see I have made it in a variety of colors and styles. You can even make the outside pieced to add some variety (notice the green and turq. bag). Level of difficulty is moderate. I taught this pattern to a group of ladies at my church that have a wide variety of skills. Everyone was able to finish this project with a little guidance.
My variations: In the pattern, the top contrasting strip is only 3/4" finished. It looks silly. Not enough of the contrast fabric showing to make an impact. I prefer to cut the top strip 2 1/2" and adjust the bottom section accordingly. I think you'll be pleased with the outcome.
Pockets: When I have a bag, I don't like 1 little piddly 5" square pocket. NO SIR! I want lots of pockets to I have places to lose... I mean PUT my stuff!!
No really, I think more pockets are better, especially if you are making this as a diaper bag. So after a little trial and error, I cut 4, 8 1/2" x 11 1/2" rectangles. I back 2 of them with the pellon fusible fleece or interfacing to make them more substantial. Following directions in the pattern, you sew right sides together and leave space to turn. You position this pocket 4" down from the top edge of the lining piece OR 12" from the top edge of the lining to the bottom of the pocket. Now you can create a variety of pockets to fit your needs. Short pocket for cell phone, skinny ones for that favorite pen, perfect pocket for your sunglasses etc.
Subscribe to:
Posts (Atom)